Customize Phone Controller
Intro
When we release the Nreal Light glasses to consumers, this will only include the glasses and not the computing unit that was part of the dev kit. You will be able to plug Nreal Light into your own Android phone and use the phone as a 3DOF controller.
So if you want to create unique experiences that stand out from the rest you can fully customize your MR app's phone controller interface. And if you are using the developer kit computing unit, you can use the Nreal Light controller.
Notice
This feature is only available in NRSDK ver. 1.2.0 and above.
This feature is for mobile phones, but you could still use the computing unit and preview your customised controller interface with scrcpy.
If you have built somethings before NRSDK ver. 1.2.0, please be aware that the Home Key and App Key have been interchanged.
How to use a phone as controller
Controller Features Description
3DoF Tracking
- Touchpad
Represents "Trigger" button,and is also used as a touchpad. It can detect touching and swipping.
- Home Button
Click to call "Exit App" menu. Press and hold to recenter your controller. We would advise developers to not use this button when developing apps.
- App Button
Can be freely customized for your app, e.g. click to open an in-app menu or perform a special action.
Two ways to use
One of the great things about the Nreal phone controller is that you could easily customise it's UI interrace. Here are two ways to use Nreal phone controller:
The default way Simply drag the "NRInput" prefab into your scene. Then when you run the app on your device, a default virtual controller("NRVirtualDisplayer" prefab) will be automatically loaded. It has 3 common controller buttons(Trigger, Home, App) on it. This virutal controller is very similar to Nreal Light controller.
The custom way Drag the "NRInput" prefab into your scene. Then drag the "NRVirtualDisplayer" prefab into your scene and modify it according to your needs. For example, add some new buttons or change the style of controller UI to match your application.
Step by step
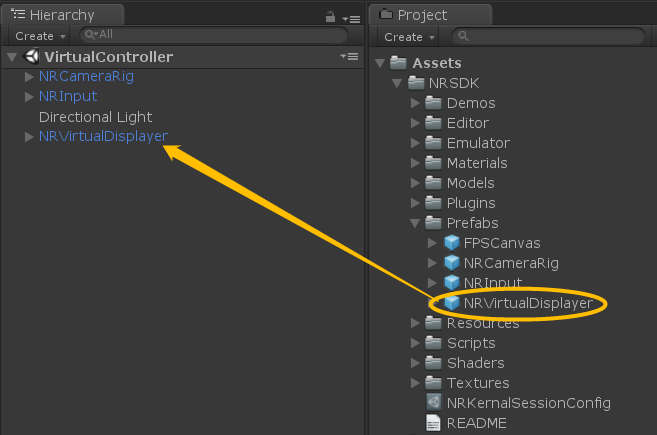
Find the "NRVirtualDisplayer" prefab, and drag it to your scene.
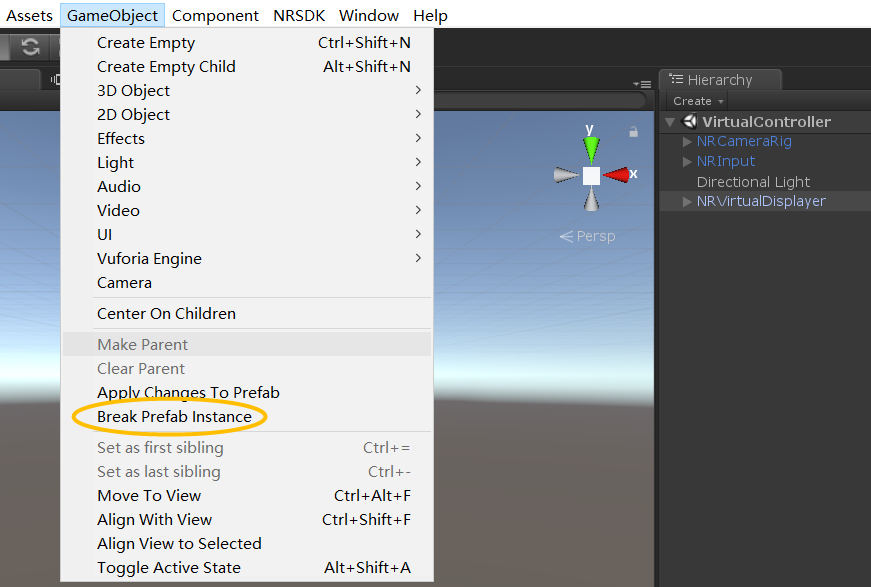
Break this prefab.
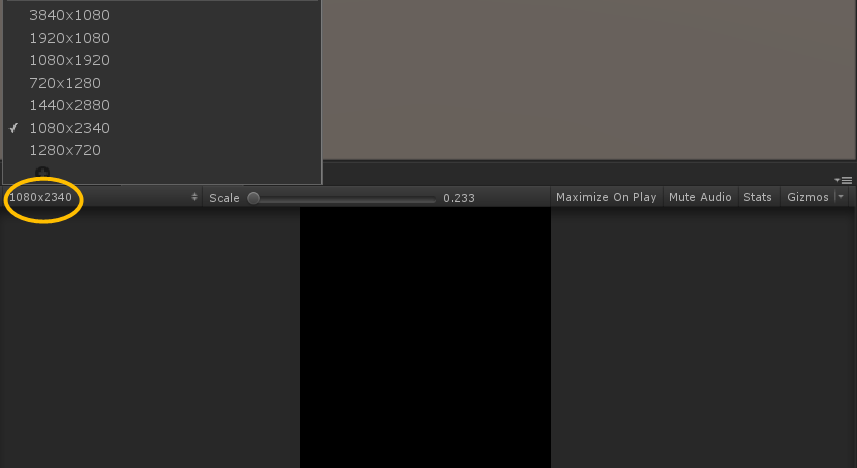
Set the resolution of Game View in Unity Editor to 1080 x 2340.
Double click the "NRVirtualDisplayer" object in Hierarchy to find it in Scene View, then you could design buttons or other UI as you like.
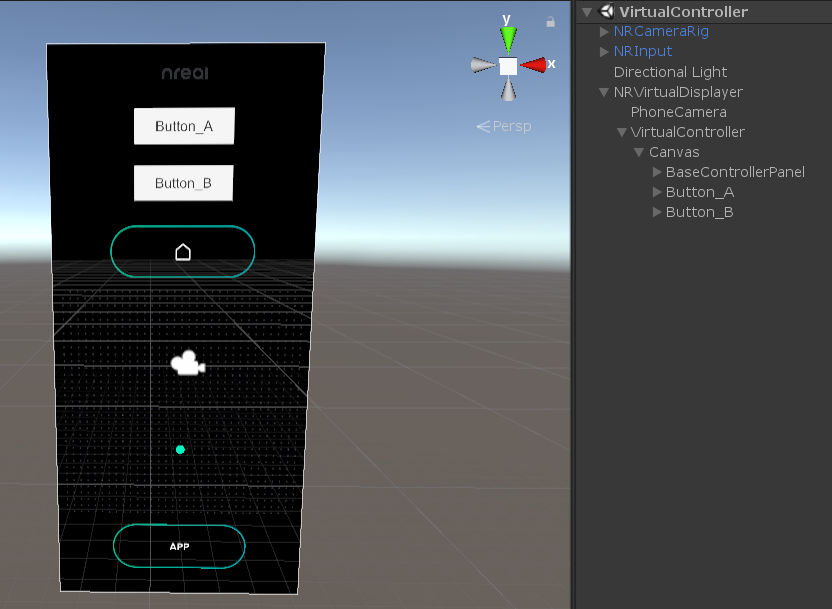
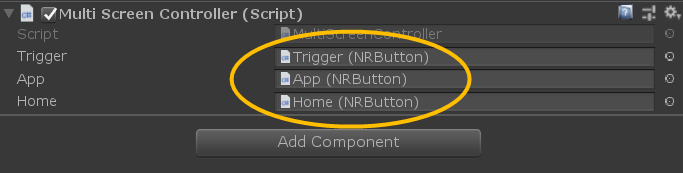
Make sure three basic NRButton are set. If you don't need them, you could set these objects as false.
If you want a sample scene, check the "Input-VirtualController" scene in SDK demos.
How to Debug a custom virtual controller in Unity Editor
Before clicking play in Unity Editor, the game view resolusion should be set to normal, like 1920*1080. Then click Play, find the "NRInput" object in the scene and enable the "EmulateVirtualDisplayInEditor" checkbox.
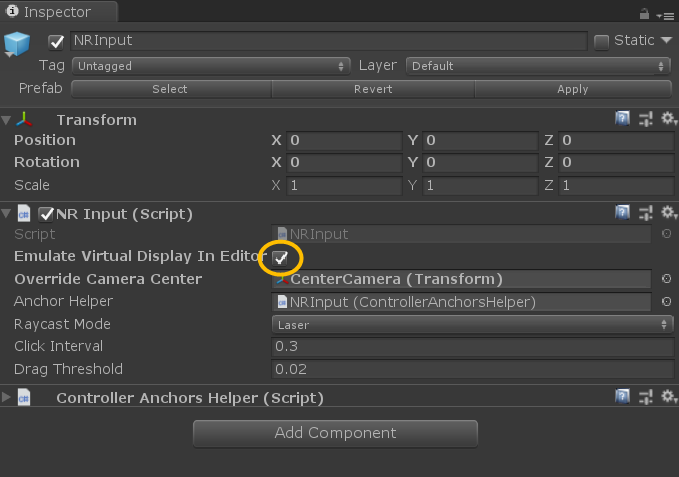
When the checkbox is ticked, a virtual controller will be shown at the right-bottom corner in the Game View. You can interact with this virtual controller with your mouse.
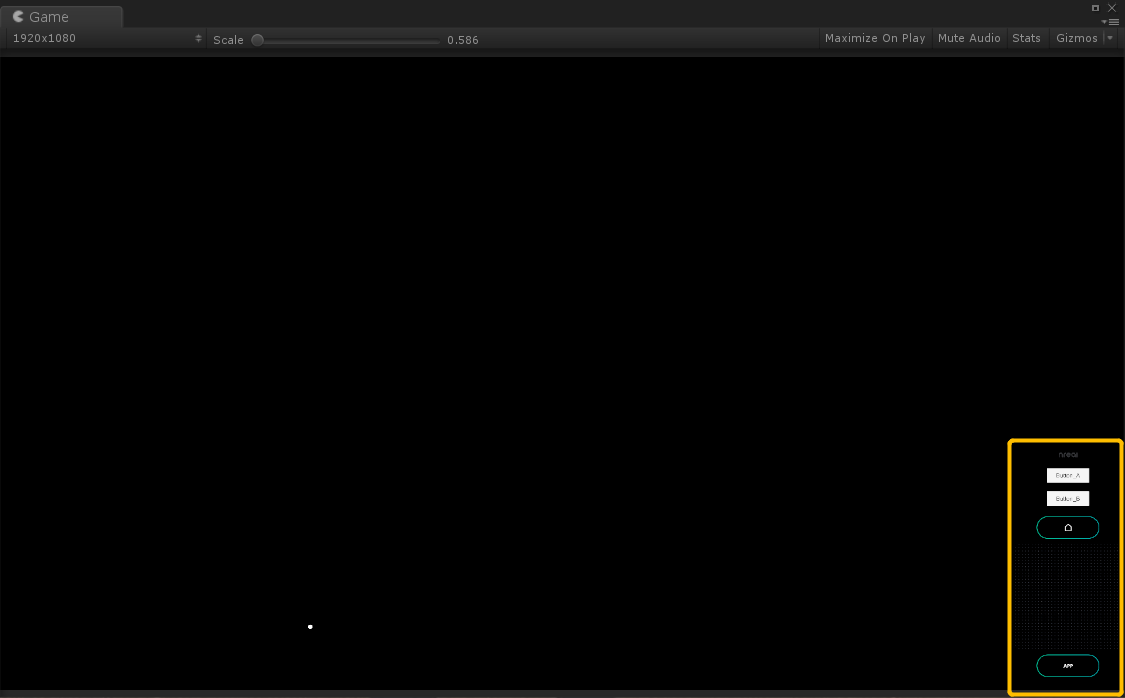
Be aware that once the emulator is enabled, all the controller button events will be fired from the virtual controller on the game screen. The original way(mouse button emulate controller button) would not work.
If you want to use the original way to emulate controller buttons, you should uncheck the "EmulateVirtualDisplayInEditor" checkbox.
Not enough?
We offer a demo in NRSDK called Input-VirtualController for this feature, try it yourself!