Quickstart for Android
Start developing your NRSDK Unity apps on Android.
his quickstart guide will help you set up your development environment and test out the sample app “Hello MR” on NRSDK.
Getting Started
Hardware Checklist
A Nreal Computing Unit (Think of it as an Android phone with no screen, so all development processes will be very similar to mobile app development.)
A pair of Nreal Light glasses
Don’t have an Nreal device? Sign up for the Nreal Developer Kit! Or try Emulator to pilot Nreal app functions without Nreal Light glasses and computing unit.
A USB-C cable to connect the Nreal computing unit to your PC.
Wi-Fi connection is not necessary. However, a Wi-Fi Android Debug Bridge (adb) connection can be used to debug and test.
Software Checklist
Unity 2018.2.X or later with Android Build Support
(It is recommended to use version 2018.4.11f1, 2019.4.26f1, 2020.3.8f1.)
-
The SDK is downloaded as
NRSDKForUnity_1.7.0.unitypackage Android SDK 8.0 (API Level 26) or later, installed using the SDK Manager in Android Studio.
Creating a Unity Project
Open Unity and create a new 3D project.
Set
Player Settings>Other Settings>Scritping Runtime Versionto.net 4.xequivalentImport NRSDK for Unity
Select
Assets>Import Package>CustomPackage.Select the
NRSDKForUnity_1.4.8.unitypackagethat you downloaded.In the Importing Package dialog, make sure that all package options are selected and click Import.
Hello MR - Your First Sample App
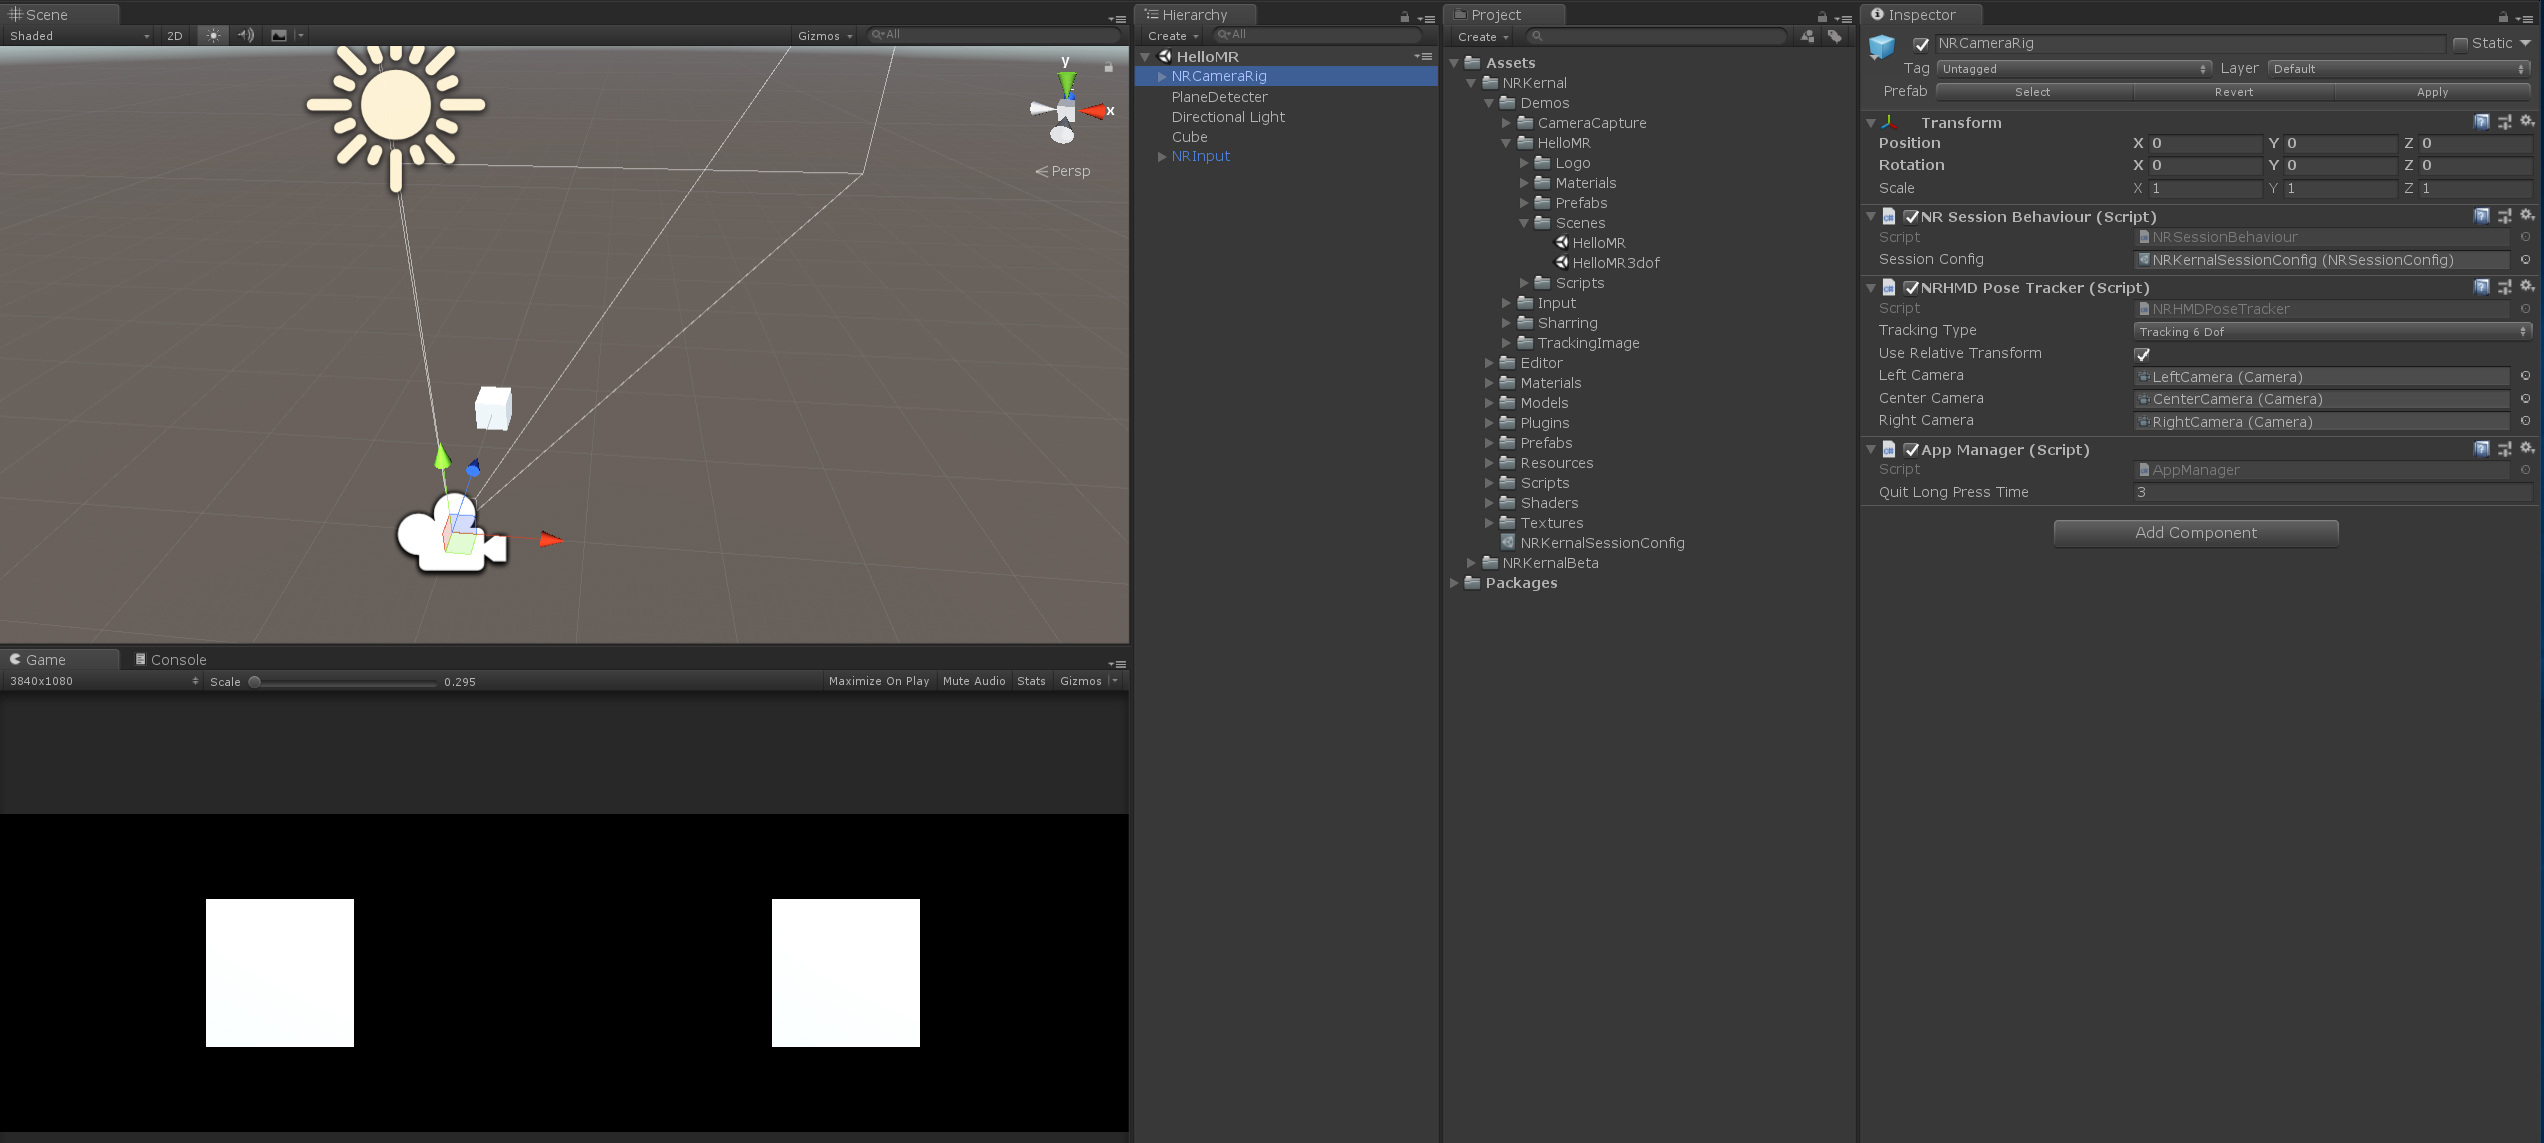
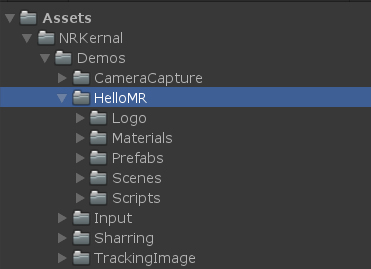
Find the HelloMR sample app in the Unity Project window by selecting `Assets > NRSDK > Demos > HelloMR.`
Configure Build Settings
Go to File > Build Settings.
Select Android and click Switch Platform.
In the Build Settings window, click Player Settings.
In the Inspector window, configure player settings as follows:
Setting |
Value |
|---|---|
|
Portrait |
|
false |
|
OpenGLES3 |
|
Create a unique app ID using a Java package name format. For example, use com.nreal.helloMR |
|
Android 8.0 or higher |
|
Android 8.0 or higher |
|
External(SDCard) |
|
Don't Sync |
Configure Adapted Devices(Optional)

You can specify supported devices and tracking mode in Assets > NRSDK > NRKernalSessionConfig.
Support Nreal Light & Nreal Air:
Noting that all the NRSDK features supported by Nreal Air are supported by Nreal Light. By default, Both
Support Nreal LightandSupport Nreal Airare selected. In this way, NRSDK will automatically adapt for Nreal Air within device’s capability, even if you’d applied NRSDK features (plane detection, image tracking, RGB camera access, etc.) not supported by Nreal Air. Nevertheless, be aware that the actual behavior of the adapted application may differ from your initial intent.In addition, if you only want the application to run on a specific platform, you may arbitrarily specify a single supported device. In this way, NRSDK’s auto adaptation will not work, and the app will not be running on unsupported devices.
Plane Finding Mode & Image Tracking Mode: When
Support Nreal Airis selected,Plane Finding ModeandImage Tracking Modewill implicitly beDisablefor Nreal Air regardless of the selection here.
Connect to Nreal Device
Enable developer options and USB debugging on your computing unit. Android Debug Bridge (adb) is enabled as default and does not require manual setting).
Connect your computing unit to your Windows PC.
Build and Run
In the Unity Build Settings window, click Build. Install your app through WiFi Android Debug Bridge (adb) after the build is successful.
Disconnect the computing unit with your PC, and then connect it to the glasses.
If it is the first time you run this app, you need to authrize the app by some tools like scrcpy.
Launch you app along with the Nreal Light controller. For instructions on how to use the Nreal Light controller, please refer to Controller.
Move around until NRSDK finds a horizontal plane and the detected plane will be covered with green grid.
Click the Trigger button to put an Nreal logo object on it.
(Optional) Use Android Logcat to view logged messages. We recommend using WiFi Android Debug Bridge (adb) to connect to your PC so that you do not have to be connected through the data cable most of the time.